Installing AVG Free AntiVirus

Back to Windows Tips

AVG Free AntiVirus is a free AntiVirus program.  It will stay active on your computer, checking each file you save or open to be sure it does not contain a virus.  It will also scan your incoming and 
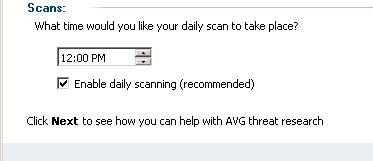
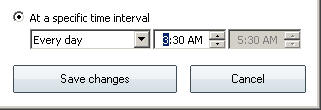
outgoing email if you use Outlook or Outlook Express.  AVG Free AntiVirus updates daily and performs a complete virus scan daily on your computer.

AVG Free AntiVirus is available for private, non-commercial, single home computer use only.  It is not to be used by companies, non-profits, or government agencies.  Complete licensing terms are shown before the software gets installed, and are available from the AVG website.

If you are not a private, non-commercial, single home computer user, you need to purchase AVG AntiVirus.  Please go to our AVG purchase section by clicking here.

Also, AVG Free AntiVirus checks for and removes Viruses.  The paid version checks for and removes both viruses and spyware, which causes even more problems with computers than viruses.  If you wish to purchase AVG AntiVirus, please go to our AVG purchase section by clicking here.

Step 1.  Remove any Existing Antivirus Program From Your Computer.

You must remove any existing antivirus program from your computer before installing AVG Free AntiVirus.  This includes any previous versions of AVG.

bulletGo to Start, then Control Panel, then select Add or Remove Programs.
bulletScroll down the list until you find your antivirus program, and click once on it.
bulletClick the Change/Remove or Remove button.
bulletFollow all on-screen prompts until your antivirus program is removed.
bulletReboot your computer (Start, then Turn Off Computer, then Restart).
bullet Repeat this process if you have additional antivirus programs

Step 2.  Download the AVG Free AntiVirus Program.

bulletDownload the AVG Free AntiVirus installation program from the AVG website.
bulletYou will be asked if you want to Run or Save the file.  Choose Save.
bulletIn the "Save As" dialog that opens, click the down arrow at the Save In location and select Desktop, then click the Save button.

Step 3.  Install AVG Free AntiVirus

bulletWhen the download is complete, click the Run button to begin the AVG Free AntiVirus installation.
bullet

(If you want to run the installation at a later time, you can just double-click the AVG Free Installation icon on your desktop when you are ready).


bulletFollow the installation process, agree to the license agreement, follow on-screen instructions, and accept all defaults.


Step 4.  Configure and Update AVG Free AntiVirus

bulletWhen installation is complete, a "Congratulations" dialog will appear.  Click Next.
bulletThe AVG "First Run Wizard" will appear with a "Congratulations" message.  Click Next.
bulletIn Step 2 of the wizard, the "Scheduled Scans" page will appear. 
bulletThe Updates section can only be "Once a Day" in the Free version, and this will be preselected.
bulletIn the "Scans" section in the middle of the page, make sure that "Enable daily scanning" is checked.
bulletAdjust the time that daily scans will take place to a time when the computer will likely be turned on but you will not be using it.
bulletThe default is 12 noon, but a time of 4 am, for example, may be more appropriate for you.
bulletWhen done, click the Next button.
bulletRecommendation:  Accept the Defaults in Steps 3 and 4 of the First Run Wizard:
bulletStep 3: DO NOT CHECK "Yes I agree to provide information..."
bulletStep 4:  DO NOT CHECK "Yes, change my default search engine to Yahoo!"


bulletIn Step 5 of the wizard, you will be asked to update AVG.  This is a very important step.  If you are connected to the Internet, click Next, and wait until the update process has completed. 
bullet(If you are not connected to the Internet, click Skip.)
 
bulletWhen the update has completed, you will be given the opportunity to register your AVG product.  Registration is NOT necessary, and you can simply hit Next to skip registration and continue.
bulletStep 7 is just another Congratulations screen.  Click Finish to close the wizard.
 

Step 5.  Perform Additional Updates, and Adjust the Scan and Update Schedules

bullet

Start AVG from the AVG icon on your desktop or in the system tray near the clock.

bullet Important:  Update AVG by clicking the "Update Now" tab on the left side of the screen.
bulletIf a dialog opens showing the updates available, click Update.
bulletRepeat the update process until you see the message "No New Update files are available".
bulletChange the time for AVG Updates to be performed.
bulletDouble-click the Update Manager Icon on the Main AVG Screen.
bulletReset the time for the update to about 1/2 hour before the time you scheduled the scan.
bulletFor example, if you scheduled your daily scan for 4 am, set the update time to 3:30 am.
bulletClick Save Changes when you are finished.


bullet

When you are done, you can click the X in the upper right corner of the AVG window to close it.  Configuration is complete.

Step 6.  You're Done!

bulletAVG Free AntiVirus will update and run daily at the times you set.
bulletYou can delete the AVG Installation program from your desktop if you wish (Right-click it and select Delete).
bulletTo Scan the computer or folders manually, right-click the drive or folder in My Computer or Windows Explorer and choose Scan with AVG Free
 
bulletTo control or see the status of your AVG scans: 
bulletStart AVG from the AVG icon on your desktop or in the system tray near the clock.
bulletClick the Computer Scanner tab on the left side of the screen.
bulletOn the screen that opens you will see buttons to:
bulletScan the whole computer
bulletScan specific files or folders
bulletChange your scan schedule (add, edit, delete)
bulletView your scan history